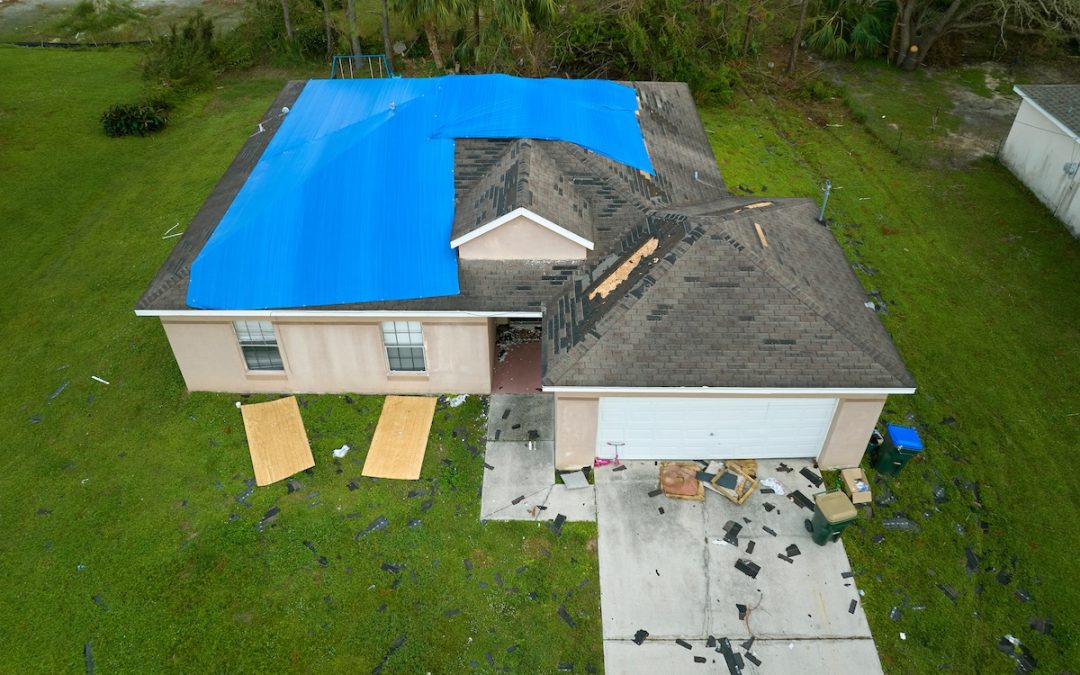
If you’ve recently experienced roof damage, knowing how to tarp a roof can help you prevent further water intrusion and protect your home until professional repairs are made. Whether caused by a fallen tree, high winds, or heavy rain, exposed roof sections need to be covered quickly and safely to avoid interior damage and mold growth.
- Temporary protection: Tarps prevent additional leaks while you wait for a full repair or replacement.
- Safety first: Knowing the right way to secure a tarp keeps you safe and reduces the risk of further damage.
- Cost savings: Prompt action can reduce costly structural repairs from long-term water exposure.
Let’s walk through the steps for how to tarp a roof the right way—safely, effectively, and with minimal tools.
⛈️ When Should You Tarp a Roof?
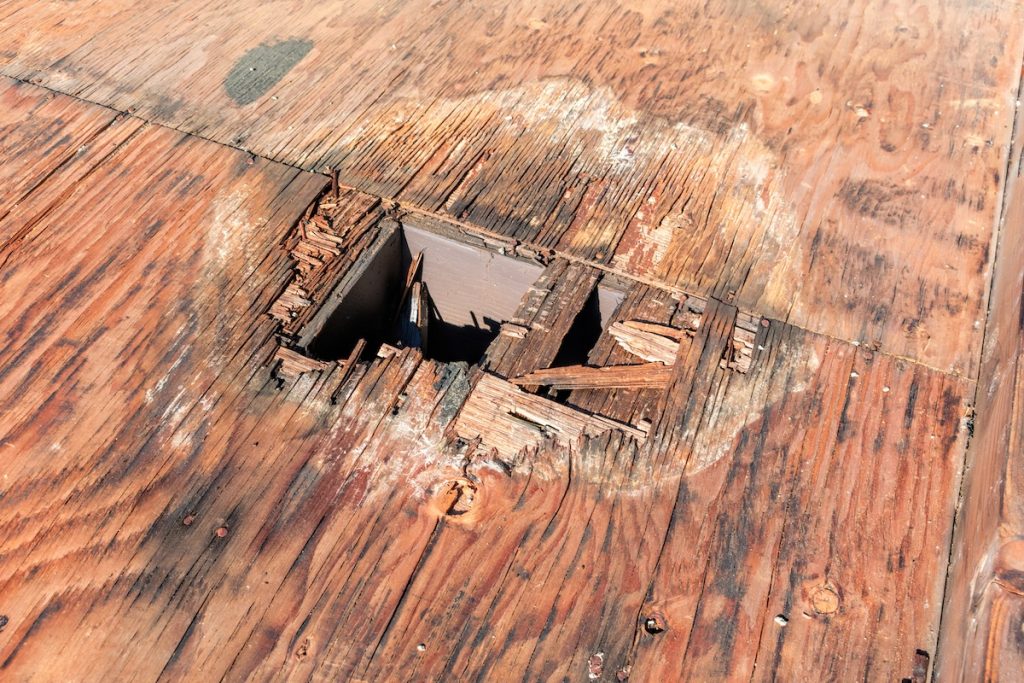
Roof tarping is a short-term solution, but it’s critical when your home is vulnerable to weather. Whether it’s a hole caused by wind, broken shingles, or storm debris, covering the area promptly helps prevent additional damage before roofers can complete permanent repairs.
Once your roof is temporarily secured, the next question is usually: how long until it’s fully fixed? The answer depends on several factors, including the extent of the damage, weather, and the materials needed. If you’re curious, our guide on how long it takes to replace a roof breaks it all down so you can plan with confidence.
If a storm has just passed and your roof is leaking or visibly damaged, tarping is a smart move. Keep in mind: insurance companies often expect homeowners to take reasonable steps to prevent further loss—so tarping quickly may also help your claim.
📋 What You’ll Need to Tarp a Roof
Before climbing onto your roof, gather all the tools and materials you’ll need. Having everything prepped will reduce how much time you spend exposed on the roof.
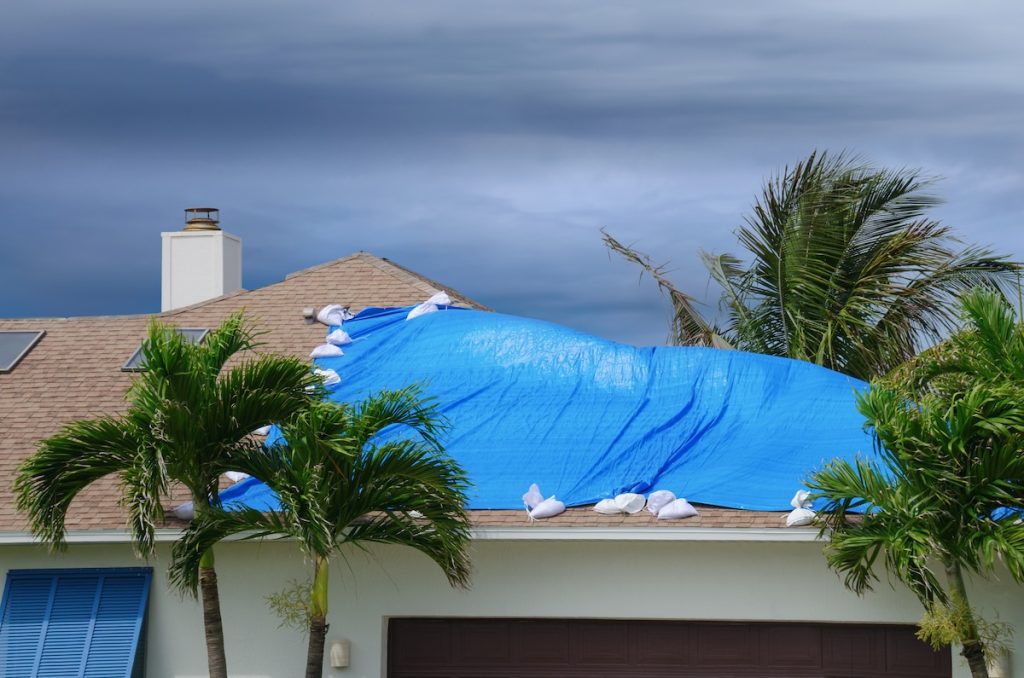
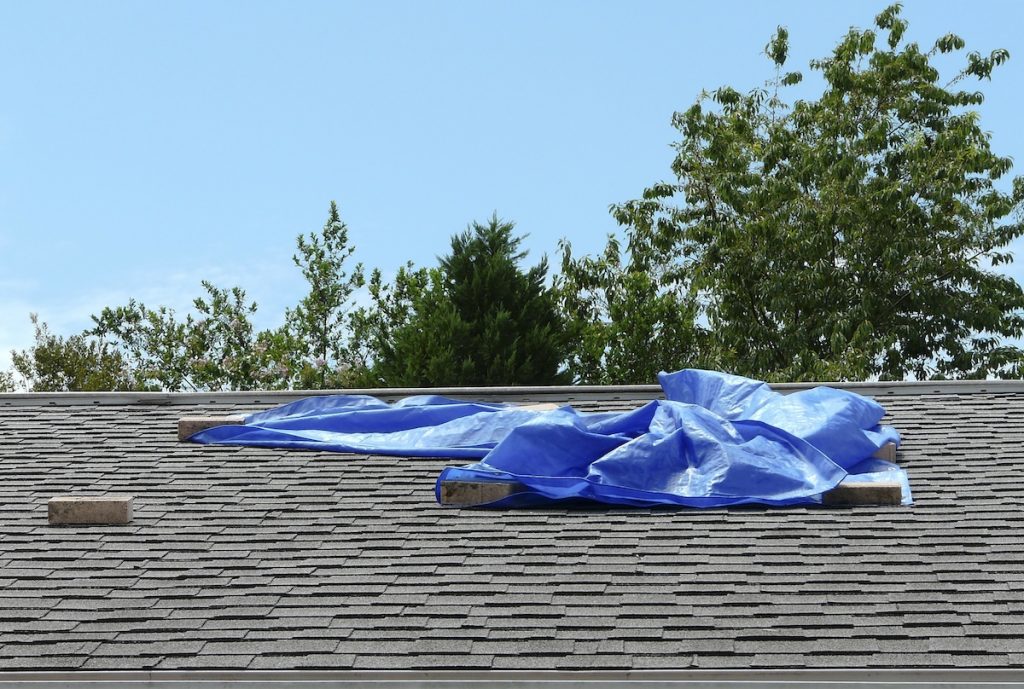
- Heavy-duty tarp: Use a waterproof, UV-resistant tarp large enough to cover the damaged area with at least 3 extra feet on all sides.
- Wood boards (2x4s): These help hold the tarp down and prevent wind from lifting it.
- Hammer and nails or screws: Secure the boards without puncturing the roof surface too much.
- Ladder: Use a tall, stable ladder with a spotter if possible.
- Safety gear: Gloves, rubber-soled boots, and a harness or safety rope are strongly recommended.
- Utility knife or scissors: For trimming tarp to size if necessary.
- Roofing tape or adhesive (optional): Can add a layer of water protection beneath the tarp.
🦺 Safety Tips Before You Begin
Tarping a roof is risky, especially if the surface is wet or unstable. Never take shortcuts when it comes to personal safety.
- Wait for the storm to pass: Never tarp during active lightning, strong winds, or rain.
- Use fall protection: A harness and roof anchors are smart precautions.
- Avoid working alone: Have a partner to assist or call for help if needed.
- Use a roof-safe ladder: Place it on flat ground and extend at least 3 feet past the roof edge.
- Walk carefully: Stay clear of weak spots, especially near sagging or visibly damaged areas.
✅ 6 Steps to Tarp a Roof Safely and Effectively
Follow these steps carefully to ensure your tarp is secure and your home stays protected until repairs are made.
- Inspect the Damage From the Ground: Look for visible signs of roof damage like missing shingles, fallen branches, or holes. Binoculars or a drone can help you spot issues without climbing up right away.
- Climb to the Roof Cautiously: Using a secured ladder, climb to the roof with your materials in tow. If possible, use a rope or pulley to lift tools to avoid carrying too much at once.
- Measure and Cut the Tarp: Ensure the tarp will extend well beyond the damaged area. Aim for at least 3 feet of coverage on each side to allow for full protection and secure anchoring.
- Lay the Tarp Over the Damaged Section: Position the tarp over the affected area so it lies flat and extends beyond the damage in all directions. Avoid wrinkles or folds that could collect water or blow loose in the wind.
- Secure the Tarp With 2×4 Boards: Roll the edges of the tarp around 2×4 boards and fasten them with screws or nails. Secure the boards to the roof—driving nails into the boards rather than the roof when possible to minimize new damage.
- Check for Gaps or Loose Edges: Walk around the area (carefully) to ensure the tarp is tight and secured on all sides. Add roofing tape or adhesive underneath the tarp edges if needed for extra leak resistance.
👉 Alternative Tarping Methods
If the roof is too steep or dangerous to walk on, there are other methods to consider:
- Use sandbags instead of nails: If you’re concerned about creating more holes in the roof, some homeowners use sandbags to weigh down the tarp edges. This method is less secure in high winds but avoids extra roof punctures.
- Hire emergency roofers: Some companies, including Streamline Roofing, offer emergency tarping services if you’re unable or uncomfortable doing it yourself.
❗️ Common Mistakes to Avoid
Even with good intentions, DIY tarping can go wrong. Avoid these mistakes to ensure your temporary fix actually helps:
- Using a tarp that’s too small: It won’t protect the entire damaged area and may blow away.
- Not anchoring it properly: Loose tarps are a safety hazard and offer little protection.
- Walking on a wet or unstable roof: It increases the risk of injury or more roof damage.
- Waiting too long: Delaying tarp installation can lead to ceiling damage, mold, and insulation issues.
📑 What to Do After the Tarp Is Installed
Once your tarp is in place and secure, the next steps are just as important. Document everything with photos for your insurance provider, and call a licensed roofing contractor to schedule an inspection and estimate.
- Take photos: Capture both close-up and wide-angle images of the damage and tarp placement.
- Call your insurer: File a claim if the damage is storm-related or part of your coverage.
- Schedule permanent repairs: A tarp is a temporary fix—don’t delay booking a full repair.
- Monitor the area: Check for sagging, water pooling, or new leaks after each rainfall.
📞 Contact Streamline Roofing for Reliable Help
Knowing how to tarp a roof gives you peace of mind in an emergency, but it’s only a short-term solution. For lasting protection, turn to the experts. At Streamline Roofing, we offer prompt, professional roof repair and replacement services, including emergency tarping when you need it most.
Don’t wait for further damage to occur. Contact Streamline Roofing today for a free quote and fast, effective roof repair you can trust.